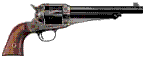
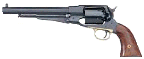

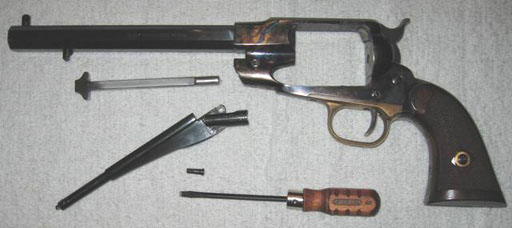
Disassembly Instructions for an 1858 Pietta Remington Revolver
By Skinny Preacher SASS# 66418

Step 1:
Place Hammer at Half-Cock (this will free the cylinder to rotate clockwise, will ease in pulling the cylinder pin forward). Lower loading lever, and pull cylinder pin towards muzzle. Now rotate the cylinder out through right side of frame.


Step 2:
Remove the loading lever pivot screw from frame (this will allow the loading lever and cylinder pin to be removed from frame). Hammer can be lowered down at this point.
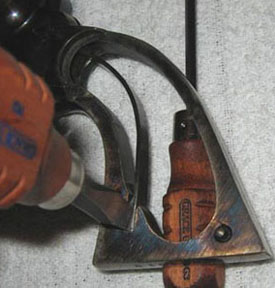
Step 3:
Remove grip screw (this will allow you to access the main-spring for removal).

Step 4:
Loosen mainspring tension screw.

Step 5:
Remove mainspring (I use a soft, non-marring object under the frame to move it away from work-surface, and then use a blunt object for force the mainspring out of the frame slot). Spring will be under tension. Make sure hammer is down to make removal easier.

Step 6:
Remove trigger guard screw. Trigger guard can now be removed (lift up and away from screw location; the butt-end of guard is tucked into frame.


Step 7:
Remove screw that holds the trigger/bolt spring (it has two legs; make not of orientation; longer leg goes to the trigger). Remove the spring (if you ever find that your cylinder is not locking up, chances are this spring has broken, and is not pushing the bolt up into the cylinder notch).

Step 8:
Remove the trigger/bolt screw (this will allow removal of trigger and bolt). Trigger should slide out easily; bolt will have spring tension between the hammer and frame.


Step 9:
Loosen and remove hammer screw.

Step 10:
Slide hammer down to allow access to the hand screw.

Step 11:
Loosen and remove hand screw. Slide hand out through bottom (take note that it has a leaf spring; if you ever find that the cylinder does not turn when the hammer is cocked…chances are that this small spring has broken).


Step 12:
Slide Hammer up through top of frame.

You have now disassembled the gun. At this point you can clean and oil the removed parts. The frame can be dunked in hot water for cleaning, or simply wiped down. If you do use water, make sure to thoroughly dry and oil. Water can be trapped in screw and pin holes, causing rust.
To assemble, follow instructions in reverse order. Reinstalling the mainspring will require some effort (I like to fold up a cleaning patch, and using it between my thumb / spring to push into frame-slot).
Tips: Get a decent set of screwdrivers made for guns. Only use a driver that properly fits the slot (this will prevent boogered screw heads). If you break a hand-spring, replace the spring, if you buy a complete hand / spring assembly you will have to refit the hand. VTIGunParts.com is a great place for parts. If you break a part or spring, be sure to buy extra springs while you are ordering (to make use of the shipping cost). If you are shooting the 1858 with a percussion cylinder, be sure to remove and clean the nipples as well.
